Generate SAS token.; 3 minutes to read +1; In this article. This section shows how to programmatically generate a SAS token for using the Event Hubs REST APIs. Base64 OPTION INFILE OUTFILE You can use different types of options with base64 command. Data can be taken from any file or standard input while encoding or decoding. After encode or decode, you can send the output in a file or print the output in the terminal.
With a secure shell (SSH) key pair, you can create virtual machines (VMs) in Azure that use SSH keys for authentication, eliminating the need for passwords to sign in. This article shows you how to quickly generate and use an SSH public-private key file pair for Linux VMs. You can complete these steps with the Azure Cloud Shell, a macOS or Linux host, the Windows Subsystem for Linux, and other tools that support OpenSSH.
Note
VMs created using SSH keys are by default configured with passwords disabled, which greatly increases the difficulty of brute-force guessing attacks.
For more background and examples, see Detailed steps to create SSH key pairs.
For additional ways to generate and use SSH keys on a Windows computer, see How to use SSH keys with Windows on Azure.
Supported SSH key formats
Azure currently supports SSH protocol 2 (SSH-2) RSA public-private key pairs with a minimum length of 2048 bits. Other key formats such as ED25519 and ECDSA are not supported.
Create an SSH key pair
Use the ssh-keygen command to generate SSH public and private key files. By default, these files are created in the ~/.ssh directory. You can specify a different location, and an optional password (passphrase) to access the private key file. If an SSH key pair with the same name exists in the given location, those files are overwritten.
The following command creates an SSH key pair using RSA encryption and a bit length of 4096:
If you use the Azure CLI to create your VM with the az vm create command, you can optionally generate SSH public and private key files using the --generate-ssh-keys option. The key files are stored in the ~/.ssh directory unless specified otherwise with the --ssh-dest-key-path option. The --generate-ssh-keys option will not overwrite existing key files, instead returning an error. In the following command, replace VMname and RGname with your own values:
Provide an SSH public key when deploying a VM
To create a Linux VM that uses SSH keys for authentication, specify your SSH public key when creating the VM using the Azure portal, Azure CLI, Azure Resource Manager templates, or other methods:
If you're not familiar with the format of an SSH public key, you can display your public key with the following cat command, replacing ~/.ssh/id_rsa.pub with the path and filename of your own public key file if needed:
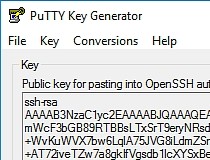
A typical public key value looks like this example:
If you copy and paste the contents of the public key file to use in the Azure portal or a Resource Manager template, make sure you don't copy any trailing whitespace. To copy a public key in macOS, you can pipe the public key file to pbcopy. Similarly in Linux, you can pipe the public key file to programs such as xclip.
The public key that you place on your Linux VM in Azure is by default stored in ~/.ssh/id_rsa.pub, unless you specified a different location when you created the key pair. To use the Azure CLI 2.0 to create your VM with an existing public key, specify the value and optionally the location of this public key using the az vm create command with the --ssh-key-values option. In the following command, replace VMname, RGname, and keyFile with your own values:
If you want to use multiple SSH keys with your VM, you can enter them in a space-separated list, like this --ssh-key-values sshkey-desktop.pub sshkey-laptop.pub.
Bash Generate Base64 Key Online
SSH into your VM
With the public key deployed on your Azure VM, and the private key on your local system, SSH into your VM using the IP address or DNS name of your VM. In the following command, replace azureuser and myvm.westus.cloudapp.azure.com with the administrator user name and the fully qualified domain name (or IP address):
If you specified a passphrase when you created your key pair, enter that passphrase when prompted during the login process. The VM is added to your ~/.ssh/known_hosts file, and you won't be asked to connect again until either the public key on your Azure VM changes or the server name is removed from ~/.ssh/known_hosts.
If the VM is using the just-in-time access policy, you need to request access before you can connect to the VM. For more information about the just-in-time policy, see Manage virtual machine access using the just in time policy.
Next steps
For more information on working with SSH key pairs, see Detailed steps to create and manage SSH key pairs.
If you have difficulties with SSH connections to Azure VMs, see Troubleshoot SSH connections to an Azure Linux VM.
Introduction
Establishing an SSH (Secure Shell) connection is essential to log in and effectively manage a remote server. Encrypted keys are a set of access credentials used to establish a secure connection.
This guide will walk you how to generate SSH keys on Ubuntu 18.04. We will also cover setting up SSH key-based authentication to connect to a remote server without requiring a password.
- A server running Ubuntu 18.04
- A user account with sudo privileges
- Access to a terminal window / command line (Ctrl-Alt-T)
If you are already running an Ubuntu 18.04 server, you can skip this step. If you are configuring your server for the first time, you may not have SSH installed.
1. Start by installing the tasksel package:
The system will first ask for confirmation before proceeding:
2. Next, use tasksel to install the ssh-server:
3. Load the SSH server service, and set it to launch at boot:
On your client system – the one you’re using to connect to the server – you need to create a pair of key codes.
To generate a pair of SSH key codes, enter the commands:
This will create a hidden directory to store your SSH keys, and modify the permissions for that directory. The ssh-keygen command creates a 2048-bit RSA key pair.
For extra security, use RSA4096:
If you’ve already generated a key pair, this will prompt to overwrite them, and those old keys will not work anymore.
The system will ask you to create a passphrase as an added layer of security. Input a memorable passphrase, and press Enter.
This process creates two keys. One is a public key, which you can hand out to anyone – in this case, you’ll save it to the server. The other one is a private key, which you will need to keep secure. The secure private key ensures that you are the only person who can encrypt the data that is decrypted by the public key.
Step 2- Copy Public Key to the Ubuntu Server
First, get the IP address of the Ubuntu server you want to connect to.
In a terminal window, enter:
The system’s IP address is listed in the second entry:
On the client system, use the ssh-copy-id command to copy the identity information to the Ubuntu server:

Replace server_IP with the actual IP address of your server.
If this is the first time you’re connecting to the server, you may see a message that the authenticity of the host cannot be established:
Type yes and press Enter.
The system will check your client system for the id_rsa.pub key that was previously generated. Then it will prompt you to enter the password for the server user account. Type it in (the system won’t display the password), and press Enter.
The system will copy the contents of the ~/.ssh/id_rsa.pub from the client system into the ~/.ssh/authorized_keys directory of the server system.
The system should display:
If your system does not have the ssh-copy-id command, you can copy the key manually over the SSH.
Use the following command:
To log in to a remote server, input the command:
The system should not ask for a password as it is negotiating a secure connection using the SSH keys. If you used a security passphrase, you would be prompted to enter it. After you do so, you are logged in.
If this is the first time you’ve logged into the server, you may see a message similar to the one in part two. It will ask if you are sure you want to connect – type yes and press Enter.
 Download puttygen for windows 7 64 bit for free. Internet & Network tools downloads - PuTTYGen by Simon Tatham and many more programs are available for instant and free download. Sep 29, 2019 Free Download 100% FREE report. PuTTY Key Generator, also known by the PuTTYgen moniker, is a small yet efficient program that can generate RSA.
Step 4- Disable Password Authentication
This step creates an added layer of security. If you’re the only person logging into the server, you can disable the password. The server will only accept a login with your private key to match the stored public key.
Edit the sshd_config file:
Search the file and find the PasswordAuthentication option.
Bash Generate Base64 Key Download
Edit the file and change the value to no:
Save the file and exit, then restart the SSH service:
Verify that SSH is still working, before ending the session:
If everything works, you can close out and resume work normally.

By following the instructions in this tutorial, you have setup SSH-key-based authentication on an Ubuntu 18.04 server.
The connection is now highly secure as it uses a set of unique, encrypted SSH keys.
Next you should also read
Learn how to set up SSH key authentication on CentOS to safely communicate with remote servers. Create the…
When establishing a remote connection between a client and a server, a primary concern is ensuring a secure…
Nginx is an open-source server utility designed to work as a reverse proxy, intercepting client requests and…
In this tutorial, Find out How To Use SSH to Connect to a Remote Server in Linux or Windows. Get started with…